
Gel Blasters shoot small gel balls. Now that we have live streaming video (see previous video tank robot) we need some targets to shoot that will automatically reset themselves and keep track of score.
The system is controlled by an ESP32 microcontroller connected to the targets. Targets are 3d printed and use a SG90 servo to reset itself and a Light Dependent Resistor (LDR) to detect when its knocked down.
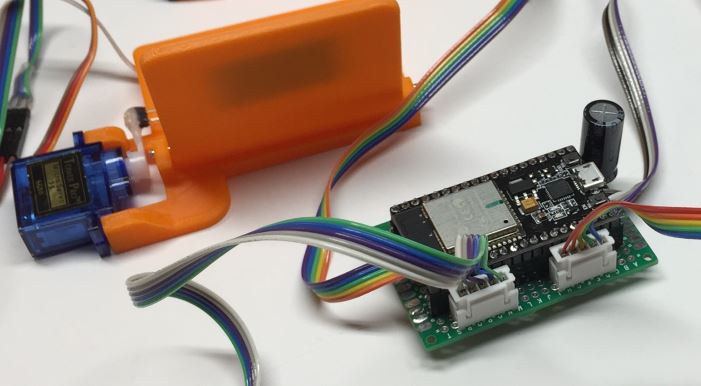
Each ESP32 module can support up to 6 targets. However the ESP32 hardware can support more targets.

The LDR uses a voltage divider circuit (10k resitor pull down) to detect when the target goes down. Black electrical tape is used to cut out more light hitting the LDR.
Header pins were hot glued to the end of the servo horn.


The Gel Blaster is mounted to a 360 pannable mount with 270 degree tilt.
Next the camera will be mounted on here as well

ESP32 is used to connect to wifi and provide a web interface using websockets to show realtime target status.

Designing the targets themselves took many itereations to get the tolerances such that they would fall over nicely and go back up and stay
Base
Target New Style Offset Hole
The tolerances of everything is pretty tight so I had to be sure the layers provided enough thickness for suport. Using the layer view of the slicer shows the final design had 3 layers of material on this hole edge which provides enough strength.


The hinge pin can be 3d printed, but a 2mm stainless metal rod works better with less friction and stays in place better.
Through trial and error everything fits perfectly as printed with no drilling or modifications required.

Hand soldering this is tedious and error prone. I planned to have multiple modules so I took this opportunity to design a PCB. This was the first PCB I've ever designed.
I used JLCPCB to convert my designs into reality. It cost $13 for 10 boards (after $8 first time customer coupon).


When building a PCB the first thing you need is a schematic

I used EAGLE to design this


After uploading my design to JLCPCB they provided this preview

The final product looks really good.

Luckily everything fits perfectly. This was my first PCB so I expected the worst!

The JST XH connectors are convenient for maintenance, but are a pain to crimp. Instead I'll see how direct soldering holds up. I will probably reinforce the connections with hot glue.

It took a while to compile some useful pinout mappins for the variations of NodeMCU boards available so I'm putting them here.
Keep in mind there are multiple formats of this module. A different module h as a row resistors and LEDS at the ends of the row. Note - this is NOT that style board!


2019-08-26 First Published
2019-08-28 Add Video
2019-09-11 PCB Photos